Manage bookings, clients, and settings efficiently from a centralized admin dashboard.
The Finance page is your hub for managing all things related to your finances, including Invoices, Transactions, Taxes, and Coupons. Here, you can easily track all payments made in relation to the appointments booked through quickly booked.
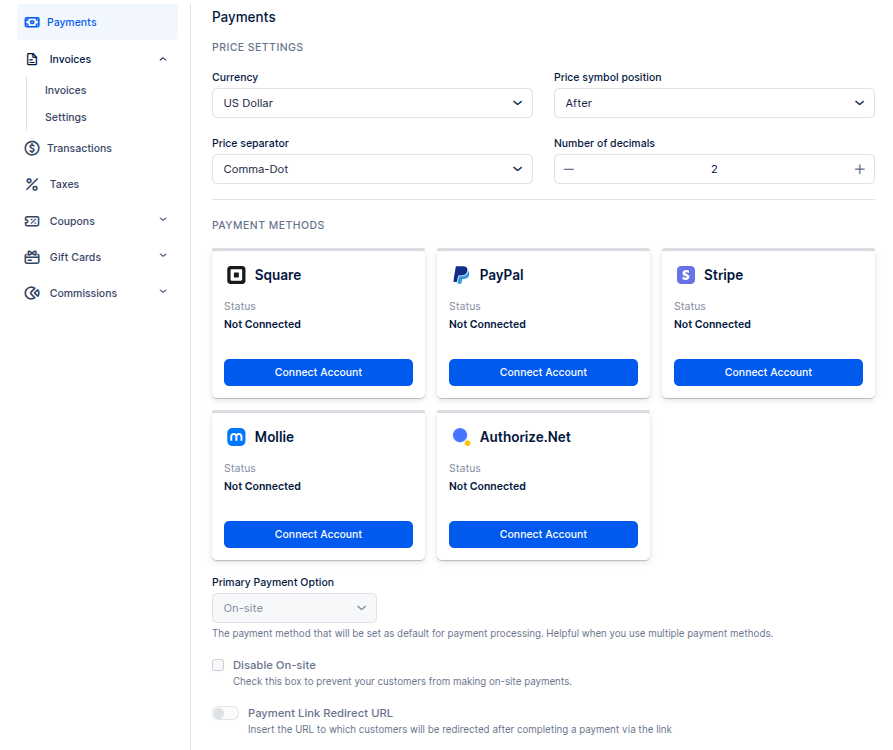
The Payments tab lets you configure your payment settings and connect payment gateways.
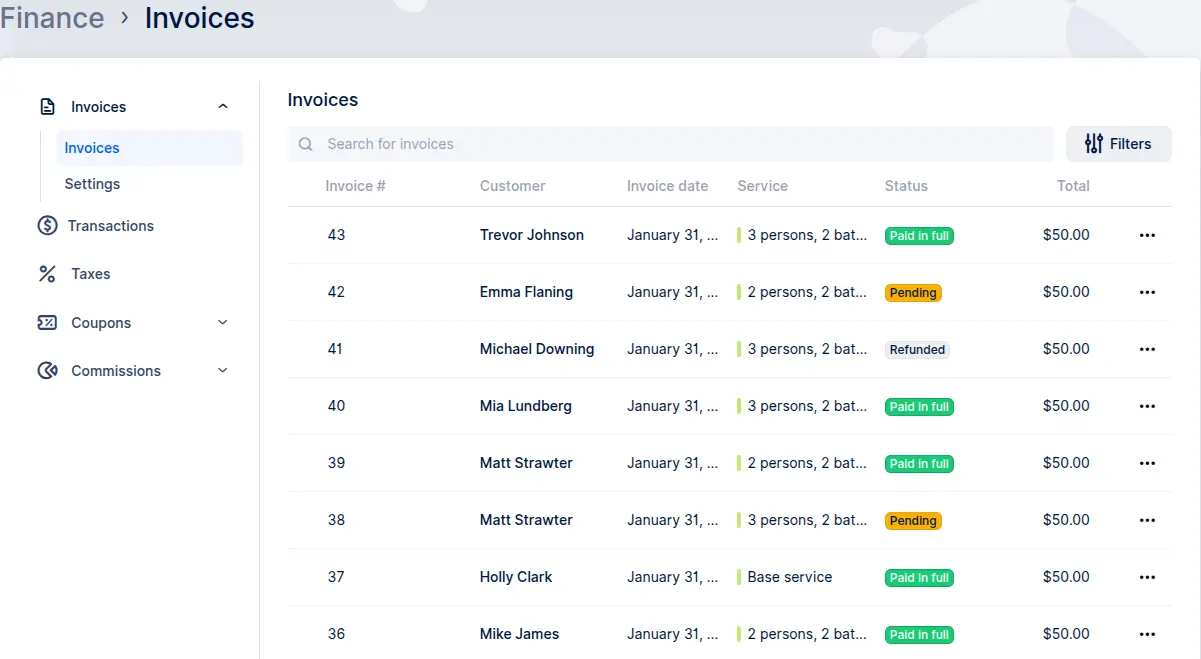
When you navigate to the "Finance" tab in quickly booked admin section, you'll be directed to the "Invoices" section. Invoices in quickly booked are automatically generated for each appointment booked, regardless of whether it's been paid for yet or not. If you've configured Recurring Appointments with payment set up for all appointments in the series, this will be consolidated into a single invoice.
In the invoice list, you'll find details such as the invoice number, the customer's full name, the invoice date (which corresponds to the booking date), the service provided, payment status, and the total amount due.
The Search field located above the invoice list enables you to search for invoices using their ID (Invoice number), customer name, and service name. Additionally, clicking on the "Filters" button next to the search field expands four filtering options. These filters allow you to narrow down your invoice search based on:
These search and filtering options provide you with the flexibility to quickly locate and manage invoices according to your specific criteria.
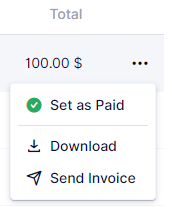
When you click on the three-dots menu for an invoice, you'll find several options available. You can mark the invoice as paid (if it was previously in pending status), download the invoice, and send it directly to the customer's email or to another specified email address.
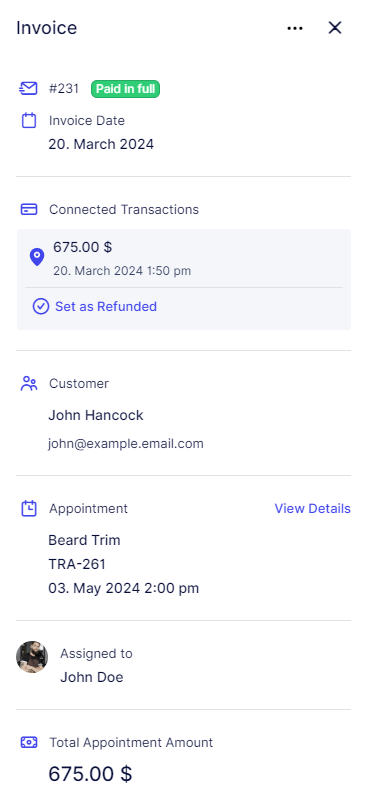
Clicking on an invoice will bring up a detailed view in the right-side menu. This view presents information such as the invoice number, date, and status, as seen in the list overview. Additionally, you'll find details related to the payment, including the appointment date and time, the service provided, and the employee assigned to the appointment. If you click on "View Details" next to the appointment section, it will take you directly to the appointment related to that invoice. This makes it easy to access specific appointment details directly from the invoice view.
Under "Invoice Settings," there are two tabs that offer customization options for your invoices.
Settings Tab:
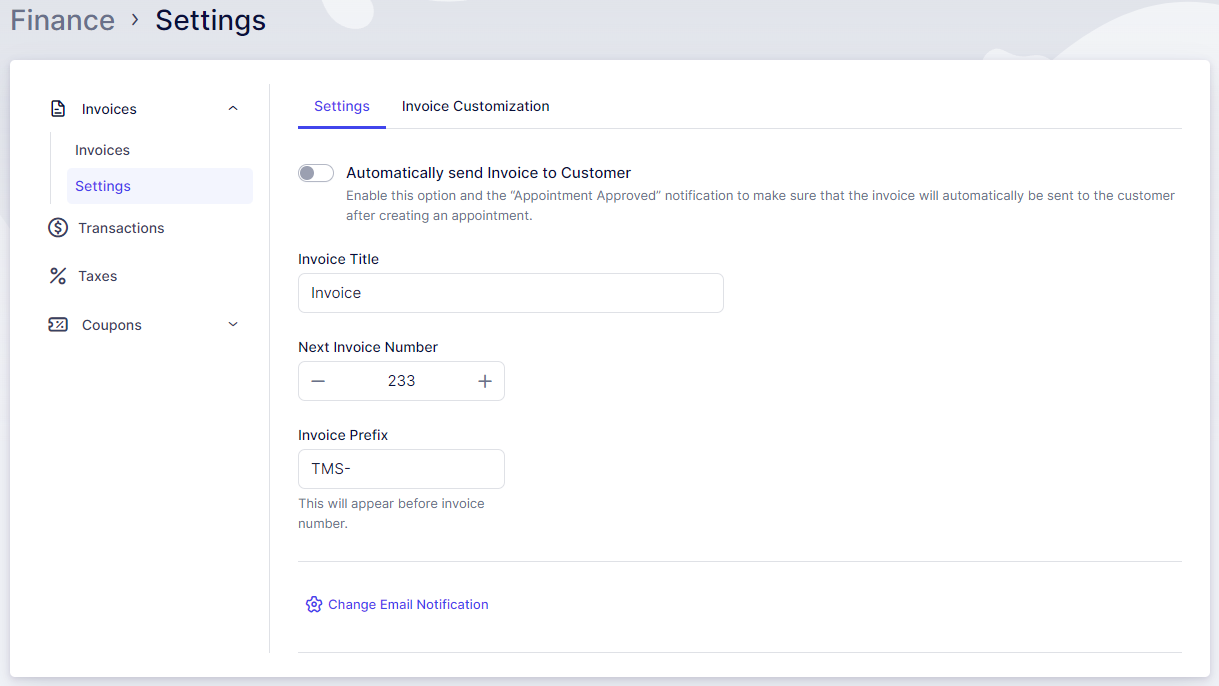
Invoice Customization Tab:
Invoice Logo:
Invoice Style:
Additional Notes: Any additional notes you'd like to include at the bottom of the invoice can be entered here. You can use placeholders, similar to those used in notification templates, to automatically populate appointment-related information in the invoice.
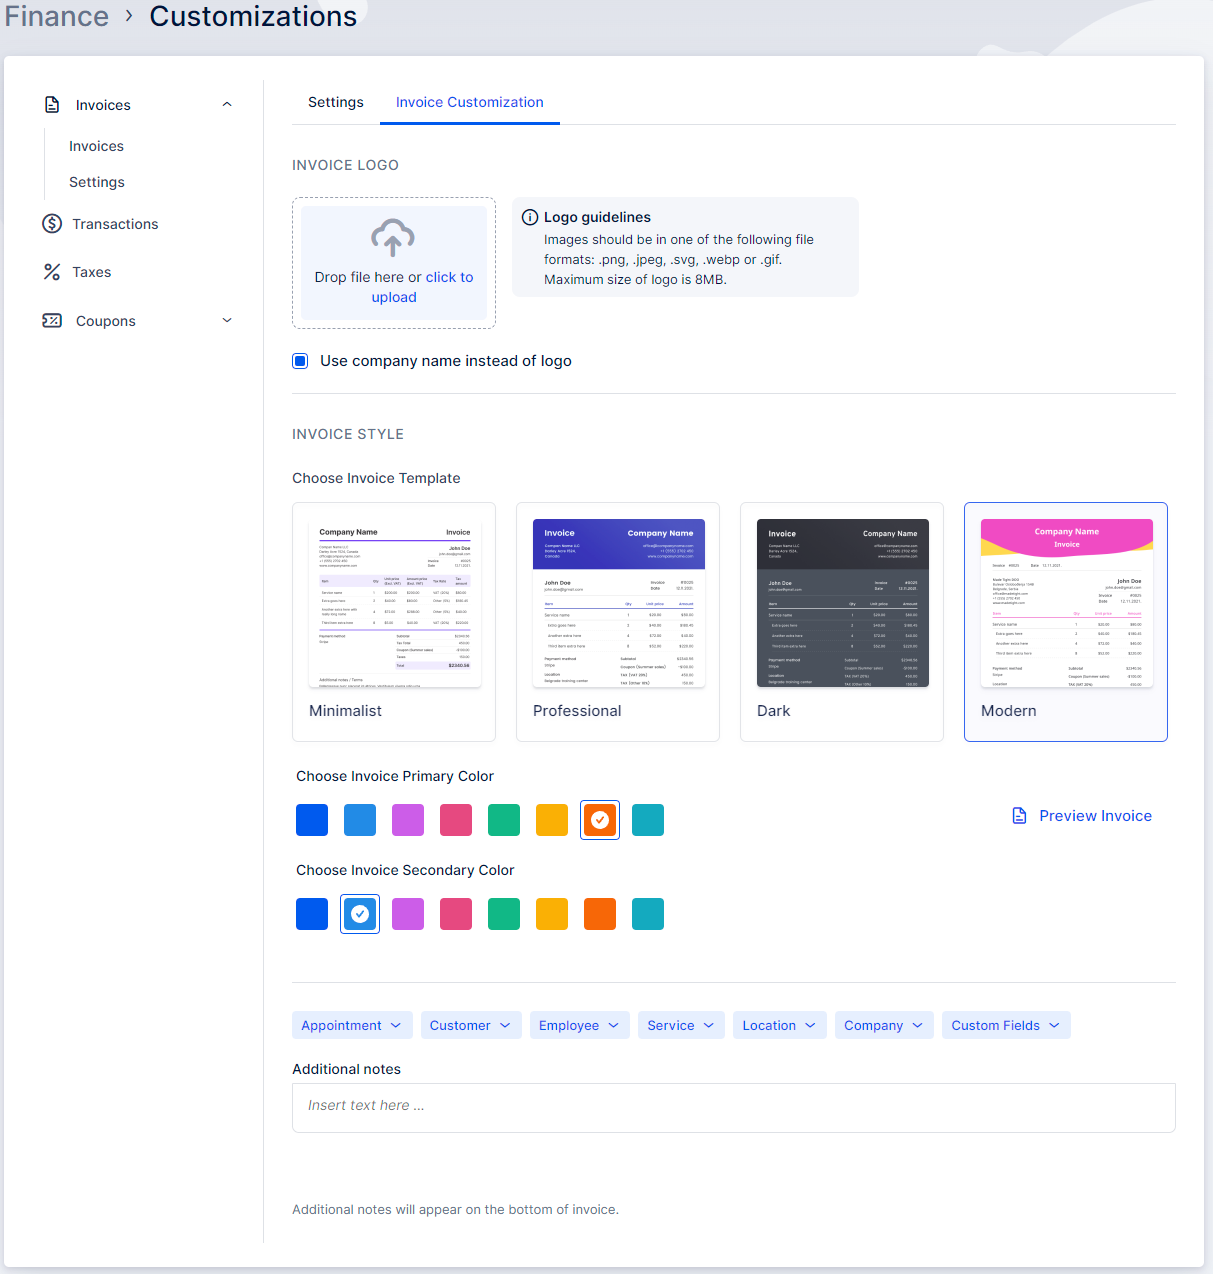
If you have entered your company's bank account number in the Company Settings, it will automatically be included in the invoice. This can serve as a convenient option for customers to make payments via bank transfer. You can utilize the "Additional Notes" section mentioned above to inform your customers that they can make payments using the bank account number provided in the invoice.
Please Note: As invoices are generated at the moment an appointment is booked, any subsequent edits to the appointment will not affect the details added using the placeholders in the "Additional Notes" section. These placeholders are fixed at the time of booking and will remain unchanged on the invoice.
In the Transactions section, you can view a comprehensive overview of all paid or partially paid appointments. Similar to the Invoices section, it includes a Search field along with filters for Customer, Service, and Employee. Additionally, there is a date range filter that enables you to narrow down transactions based on the transaction date (the date when the appointment was paid or partially paid).
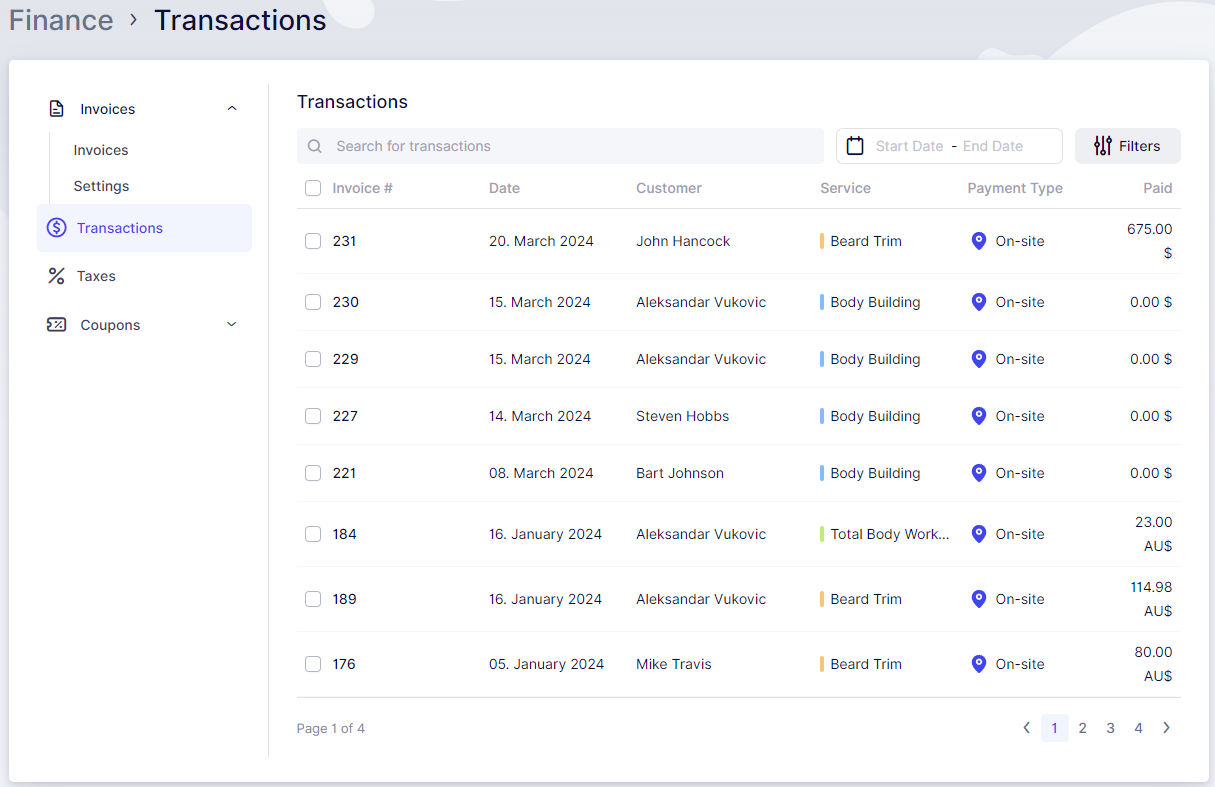
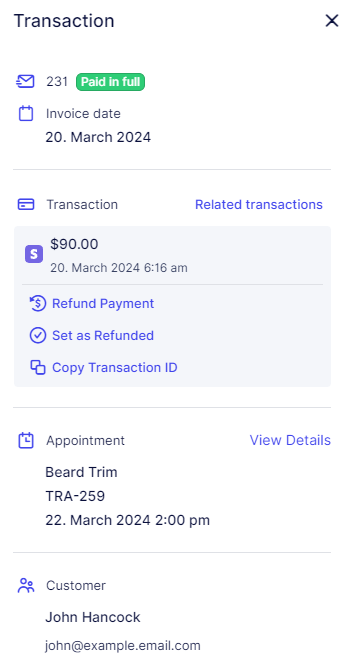
When you click on a transaction, a detailed view appears on the right side of the screen. This view provides specific details such as the payment method, total price, appointment details, and more. It offers a similar layout and functionality to the side menu in the Invoices section, allowing you to efficiently manage and track your financial transactions.
If the appointment was paid online, it will also contain the Transaction ID and the option to Refund the Payment, while all transactions (online and on-site) will include the "Set as Refunded" option that allows you to mark the transaction as refunded if you refunded the customer in person, for example.
In the Taxes section, you have the ability to manage taxes for your services and extras. You can create multiple taxes; however, please note that, at this time, it's possible to assign only one tax to a service or an extra.
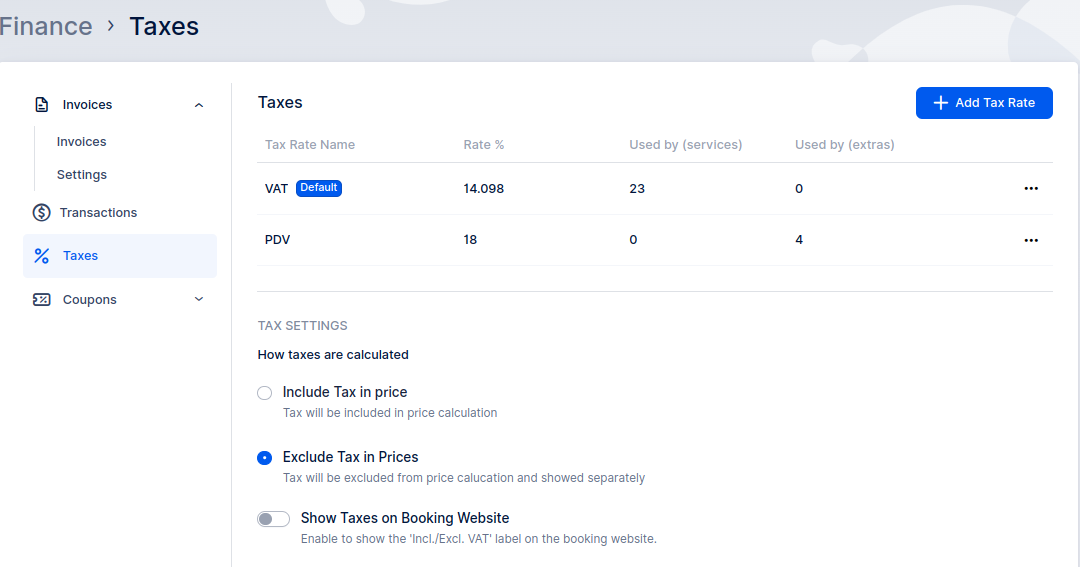
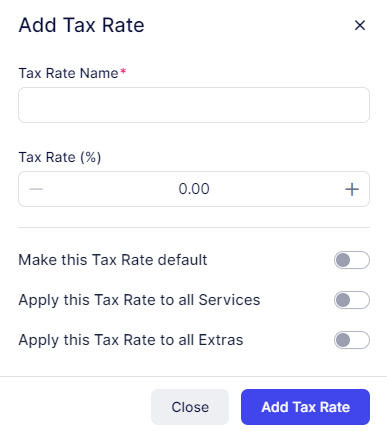
To add a new tax rate, click on the "Add Tax Rate" button. A pop-up will appear where you can input the following details:
Please note that once you've configured these options, click "Save" to apply the changes.
In the "Tax Settings" section, you have two options for how your taxes will be calculated in relation to the service price:
Choose the option that best fits your pricing strategy, and remember to save your changes after making a selection.
In the "Manage Services and Extras" section, you have an overview of all your services and extras along with the taxes assigned to them. Here, you can set a specific tax for each extra or service. If you prefer not to apply tax to a particular service or extra, you can set it to "Nontaxable".
Additionally, you have options to sort, search, or perform bulk edits on this list for better organization and management.
Your configured taxes will be displayed on your booking website, visible during the booking process under the "View detailed pricing" option. They are also shown on the invoices generated by quickly booked.
Please note: If an invoice was created before a tax was added, the tax will not be displayed on that invoice. Taxes will only appear on invoices created after the tax has been added and configured.
Coupons are a powerful tool to engage existing customers and attract new ones. With quickly booked, you can create and manage coupons easily. These unique codes can be shared with your clients so they can enjoy discounts when booking appointments.
Once you create a coupon code, you can manually add it on the Appointments page for your clients, or you can send the code directly to your customers. They can then use the coupon during the booking process to get the discount.
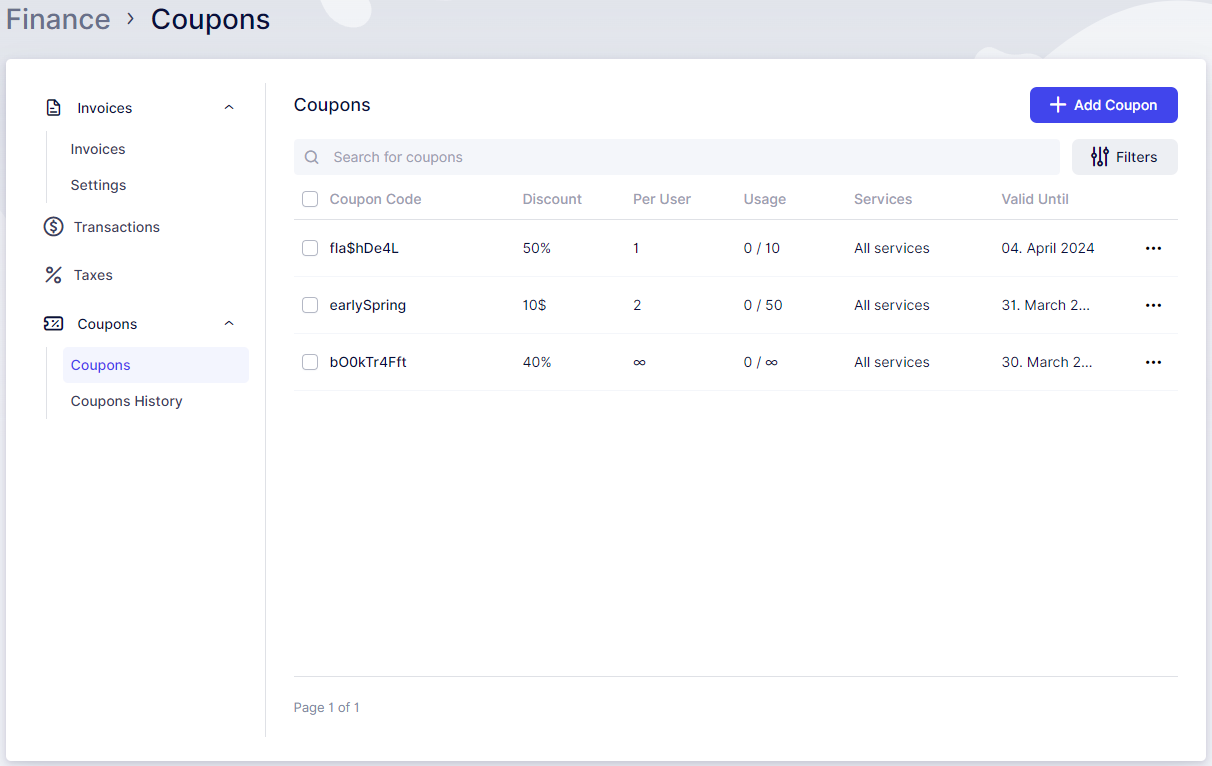
To create a coupon, click on "+ Add Coupon," which will open a form where you need to enter:
Other options are not mandatory, so you can set up:
Under Services, you can decide whether the coupon applies to all services or only specific ones.
Discount Type: Choose how the coupon will be applied:
Sending Options:
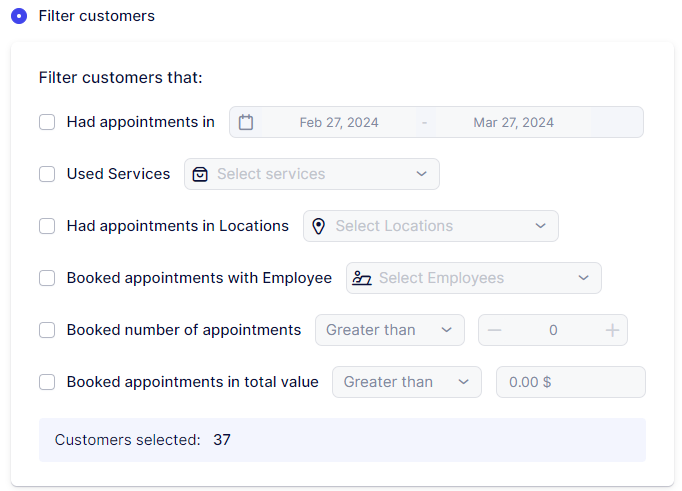
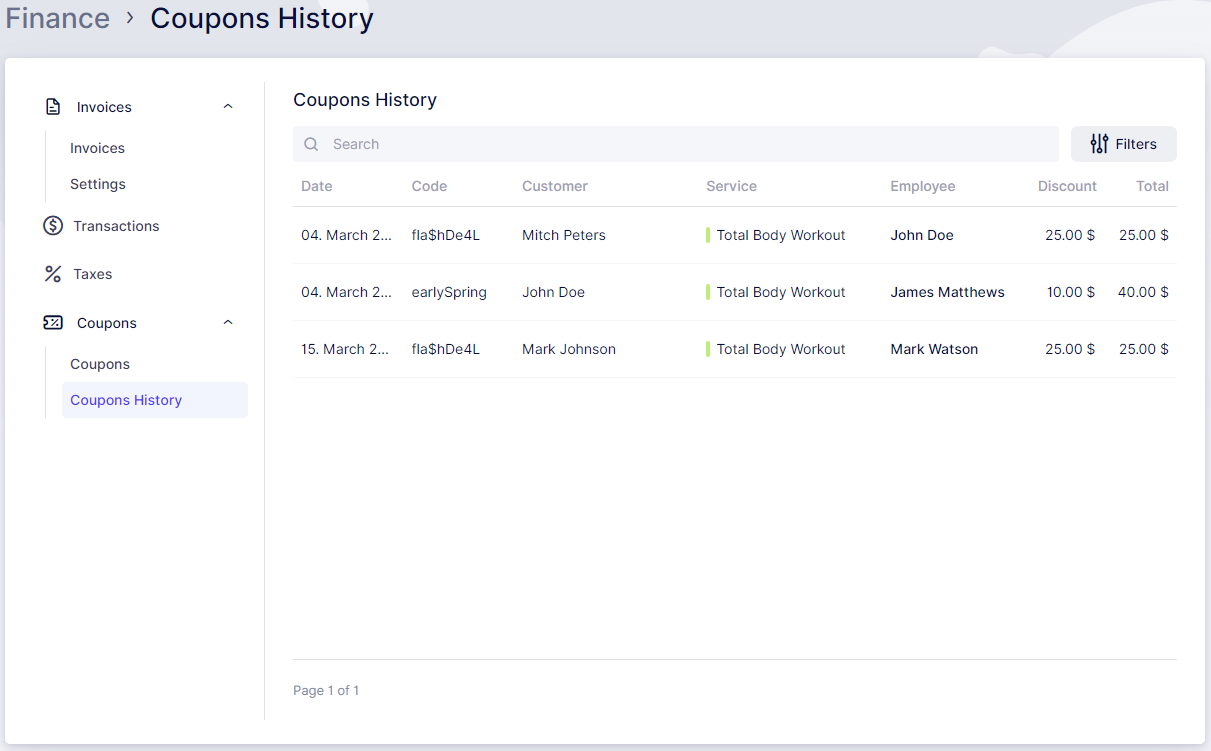
The Coupon History section provides a detailed overview of coupon usage for appointments. Here's what you can find:
You can search through the list of used coupons and filter it by Service, Employee, and Customer, making it easy to track coupon usage and its impact on appointments.
The Gift Card feature in quickly booked gives your business a powerful way to boost customer loyalty and attract new clients. By allowing customers to purchase gift cards for themselves or others, you’re creating opportunities for repeat bookings and word-of-mouth promotion.
Whether it's for birthdays, holidays, or just a thoughtful gesture, gift cards are a convenient and flexible option that benefits both your clients and your business.
Seasonal Promotions: Sell discounted gift cards during holidays or special events.
Referral Rewards: Offer gift cards as incentives for referring new clients.
Business Gifting: Allow corporate clients to purchase gift cards for employee rewards.
Flexible Gifting: Enable users to select custom amounts and expiration dates for personalized gifts.
You can choose whether to display the Gift Card option on your booking page and customize how it appears.
To configure this, navigate to the Finance tab > Gift Cards > Settings and select your preferred display option:
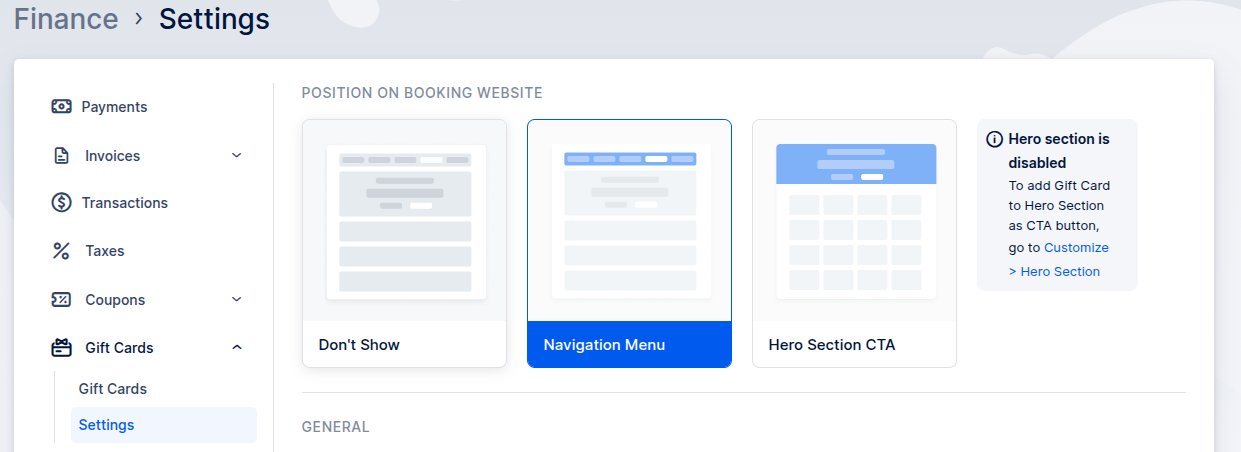
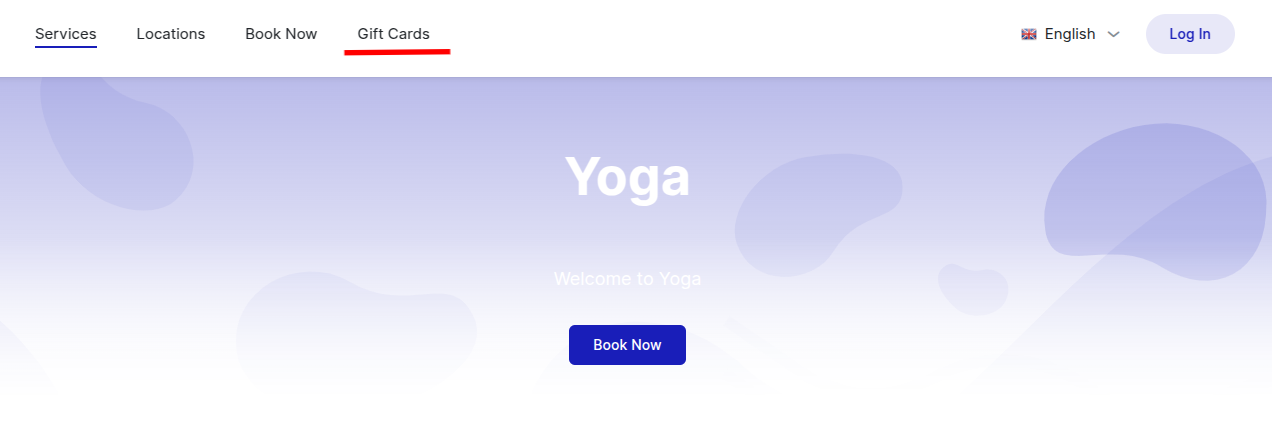
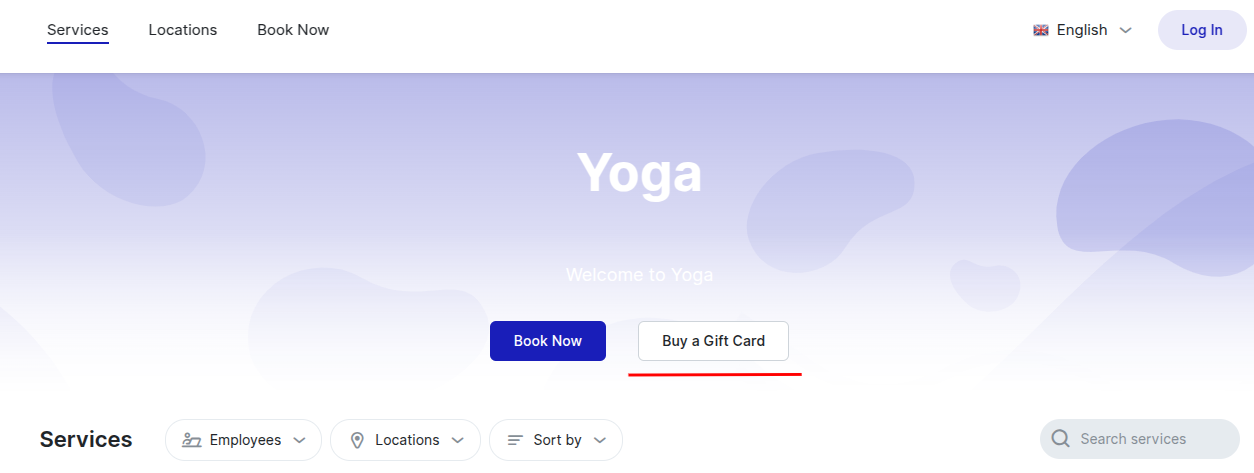
Depending on your selection, the Gift Card option will be shown as a separate tab or Hero Section CTA button:
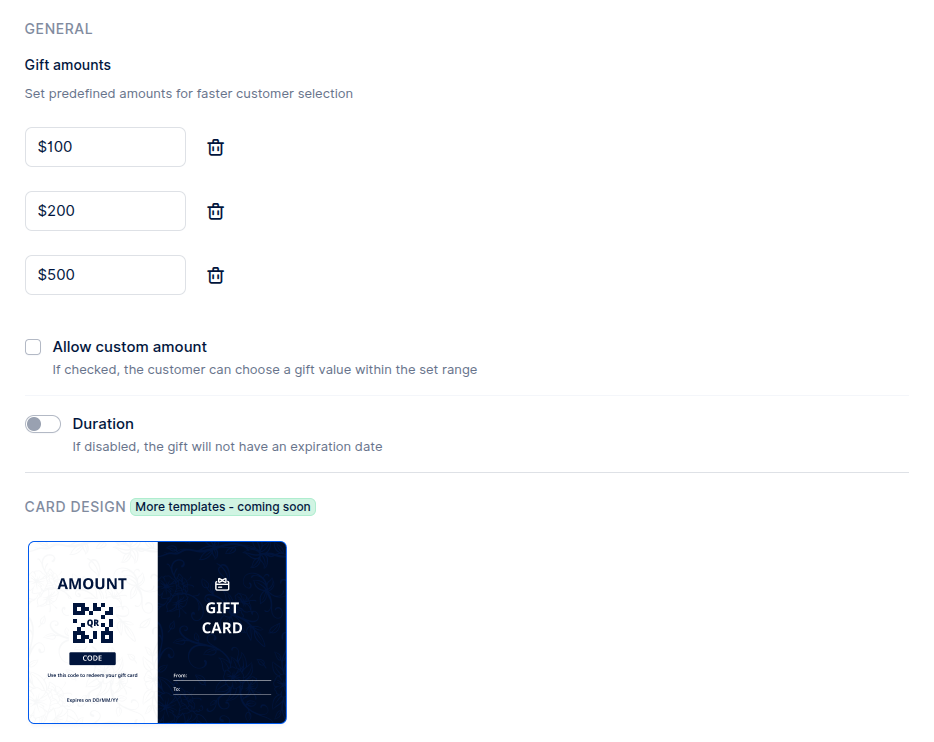
The bottom part of the Settings page allows you to create pre-defined values of gift cards or to allow custom values and set their expiration.
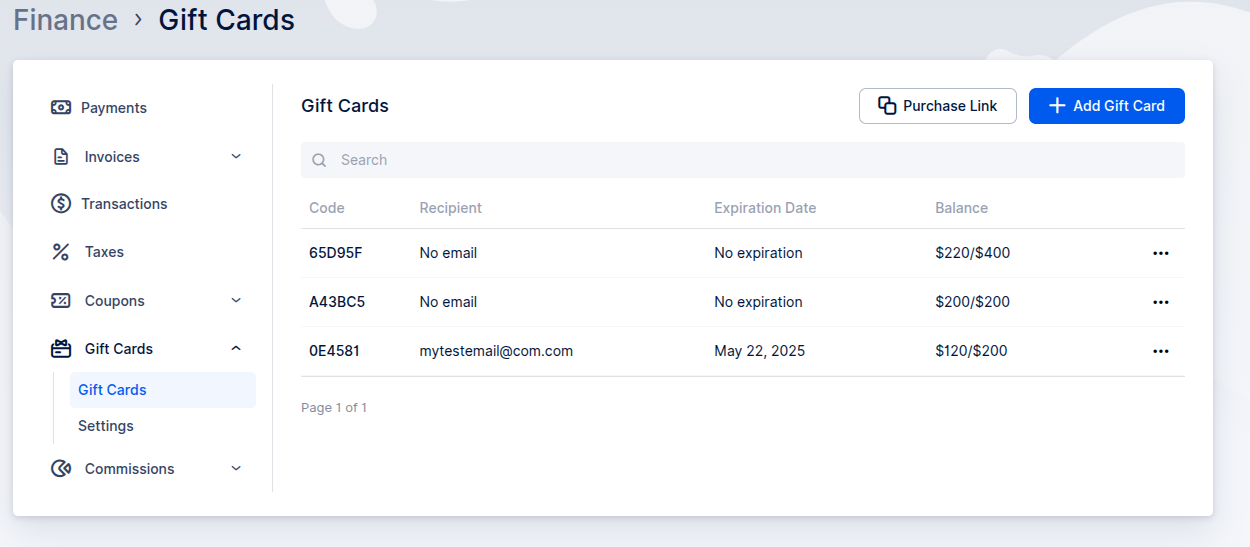
Navigate to the Finance > Gift Cards > Gift Cards tab to review the history of issued gift cards. This section also allows you to manually create new gift cards and send them directly to customers.
Additionally, the page displays key details for each card, including its original value and current remaining balance. Typically, the original value appears on the right, while the remaining balance is shown on the left.
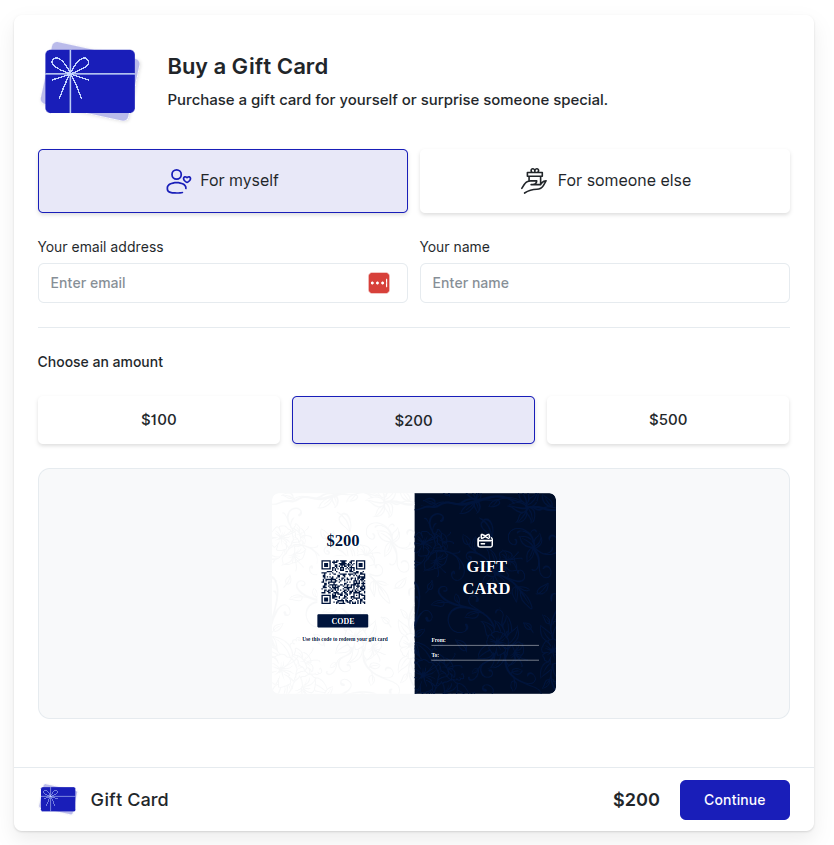
Gift Card Delivery Options
You can purchase a Gift Card for your own use or choose to send it directly to someone else's email address.
Entering Recipient Details (Optional)
The purchase form includes fields for a name and email address. Providing this information is optional. Even if you leave these fields blank, you can still complete the purchase because you will always be able to download the Gift Card file yourself at the end of the process.
Recommendation for Gifting
If you are purchasing the Gift Card for someone else, we strongly recommend entering the recipient's correct email address to ensure they receive the Gift Card directly via email.
The next screen will present all available payment options. Please select your preferred method to proceed with the payment.
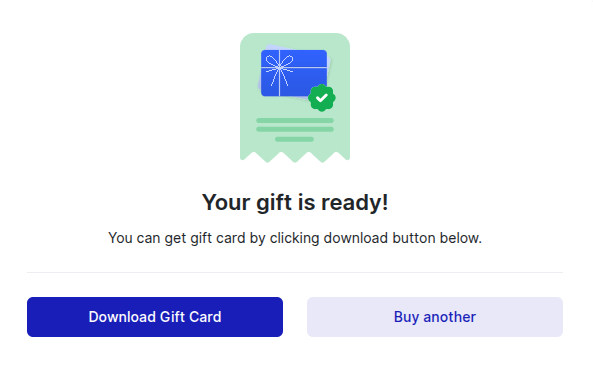
After your payment is successfully processed, you will receive a confirmation message. You will also be given an option to download the Gift Card as a PDF file.
This PDF file contains the unique Gift Card code, which can be applied when booking services. It also includes the name and email address that were provided during the purchase process.
The Commission feature in quickly booked allows administrators to set and manage commission rates for employees based on the services they provide. This feature helps track earnings and ensures accurate compensation for employees.
This feature is available on all quickly booked plans, including the Free plan.
Commission tab will show you the list of all employees along with the number of their appointments, revenue they made, commission type, and earnings in a selected data range.
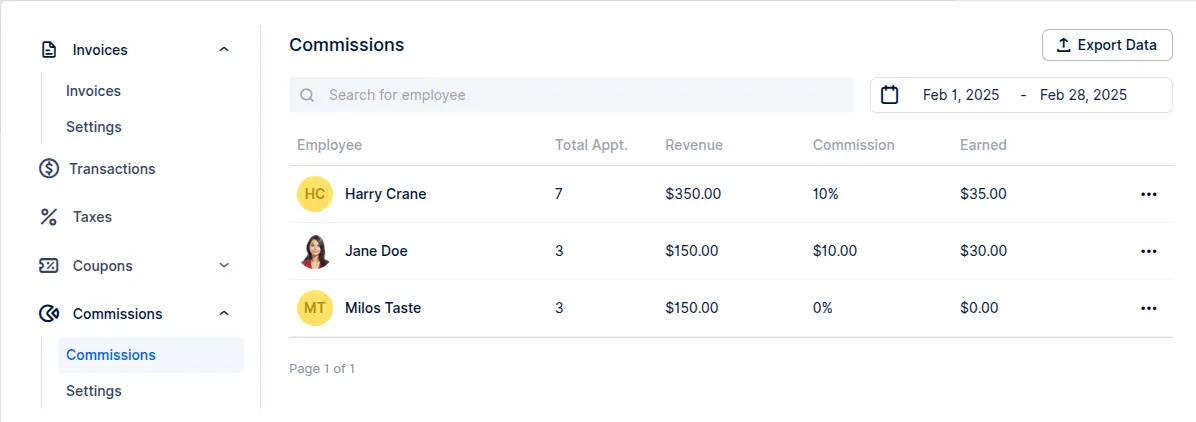
Clicking on the three dots next to each employee, you will be able to adjust custom commission for each employee and have more flexibility when it comes to employee earnings.
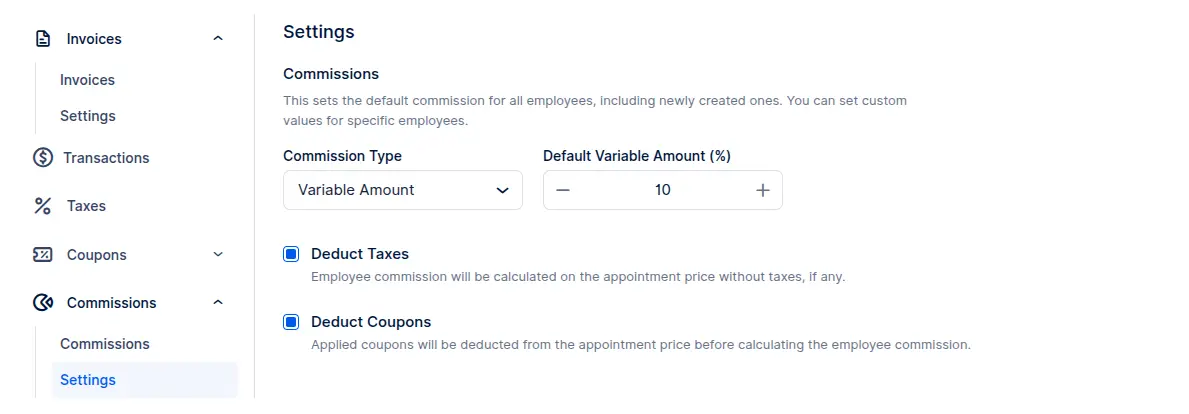
Under the Settings tab, you will be able to set a default commission rate for all existing and newly created employees.
You can choose between a variable amount in percentage or a fixed amount in the currency you are using ($, €, £, etc).
In case a variable amount is selected, there is an option to deduct tax and coupon value, if applicable.
Got questions? We’ve put together clear answers to help you get started with confidence.

All plans include unlimited staff members, services, and locations. There are no per-user or per-location fees and no upgrade required as you grow. Everything is included from day one.

Yes. You can collect deposits, full payments, or partial payments for any service. You decide the amount clients pay upfront, and the rest can be charged later or at the appointment.



